Assignment
Project #3: Guerilla Installation
| Formal | Scale, form, proximity, proportion, structure |
| Technical | · Work using modular forms in a non traditional space· Create a work for a specific location considering space |
| Conceptual | Choose a site where you will be constructing a modular composition that will be built off site and reconstructed onsite. |
Description:
Using cardboard and other needed construction materials you are to work to create a 3D form. This form should:
- Be worked on in a sketch format incorporating the site
- an image of the intended site posted here
- be a minimum of 2’ in dimension.
- Be well crafted:
- only brown cardboard with no text.
- Tape, glue, and other materials are for structure.
- Be modular
- this means the piece can be assembled on site and installed
- Incorporate volume and mass (no layered planar structures)
The piece should:
- Not restrict access on the site
- Be fastened securely or freestanding
Process
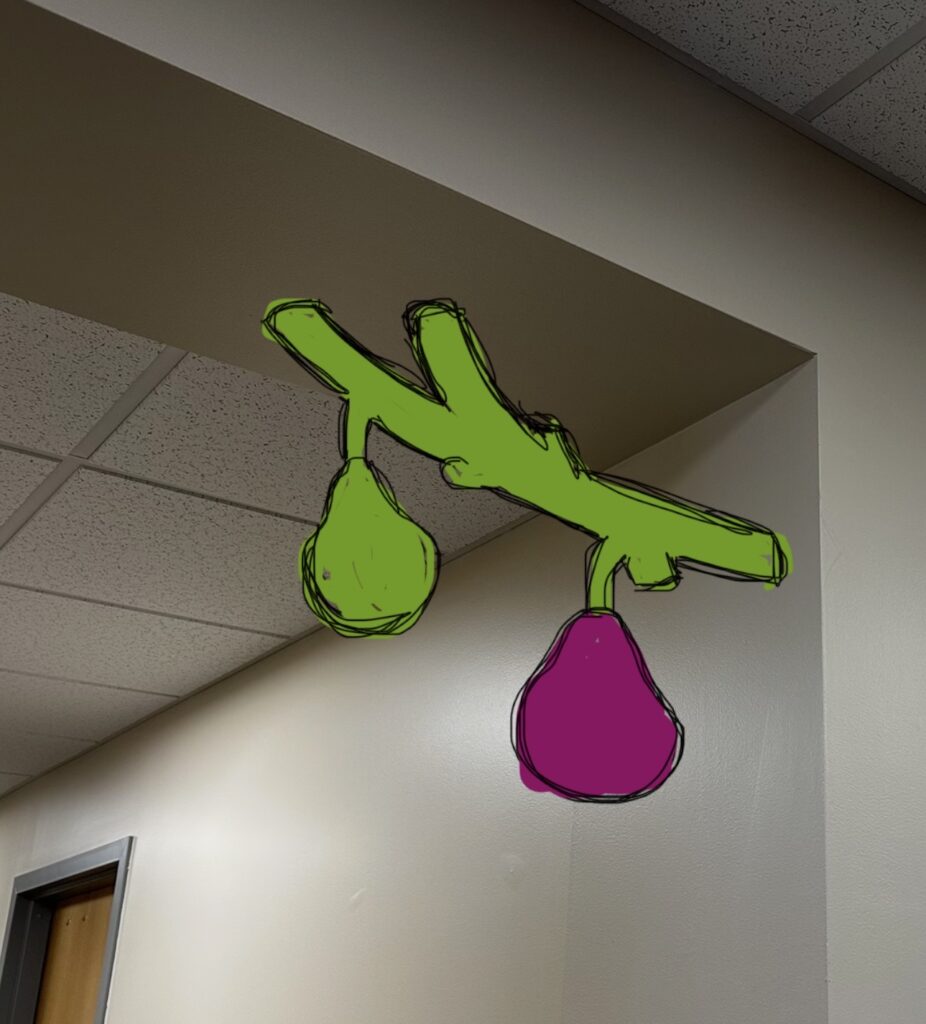
The thing I struggled with most with this project was figuring out where to put the sculpture. I didn’t want the placement to be an afterthought since a big aspect of the assignment was how the sculpture interacts with its environment. I thought that the Pass Office would be the easiest place for me to get permission to install the piece since I work there and know the people in the space. So I tried to figure out spots within that space where I could install a sculpture. Initially, I thought a corner of an archway would work best. The piece would have to interact with two planes, what’s more interactive than that? I didn’t get permission to put the piece in the hallway, however I did get permission to put it directly in the Pass Office. The only good spot for it was a wide pillar connecting to the ceiling (shown in the final product picture).
I picked the subject and meaning behind the piece specifically for this office in mind. As explained in my artist statement, the fig tree analogy really stuck with me and is something I associate the TRIO community with. If you can have a conceptually dynamic piece, then I think I achieved that.
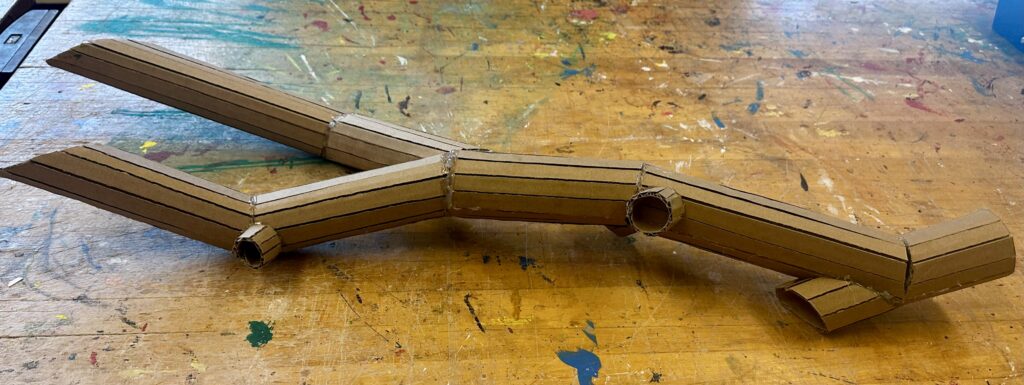
I wanted to make an unnaturally large branch of figs so I wouldn’t have to make tiny cuts that would end falling apart later. So I decided to make a branch with just two figs, making them to scale to the branch as much as possible. Usually organic shapes are easiest to build/draw because they’re hard to make look “wrong”, but I did not realize that working with cardboard would make that so much more time consuming then I thought. I had to round out a flat stiff material but making precise cuts and gluing them back together. In order to make the branch I slit the cardboard vertically (the long way) so it bends into a cylinder. Then I cut darts into it so it could change direction. I added on a branch coming off from the main one and knots with the leftover pieces to make it look more dynamic.
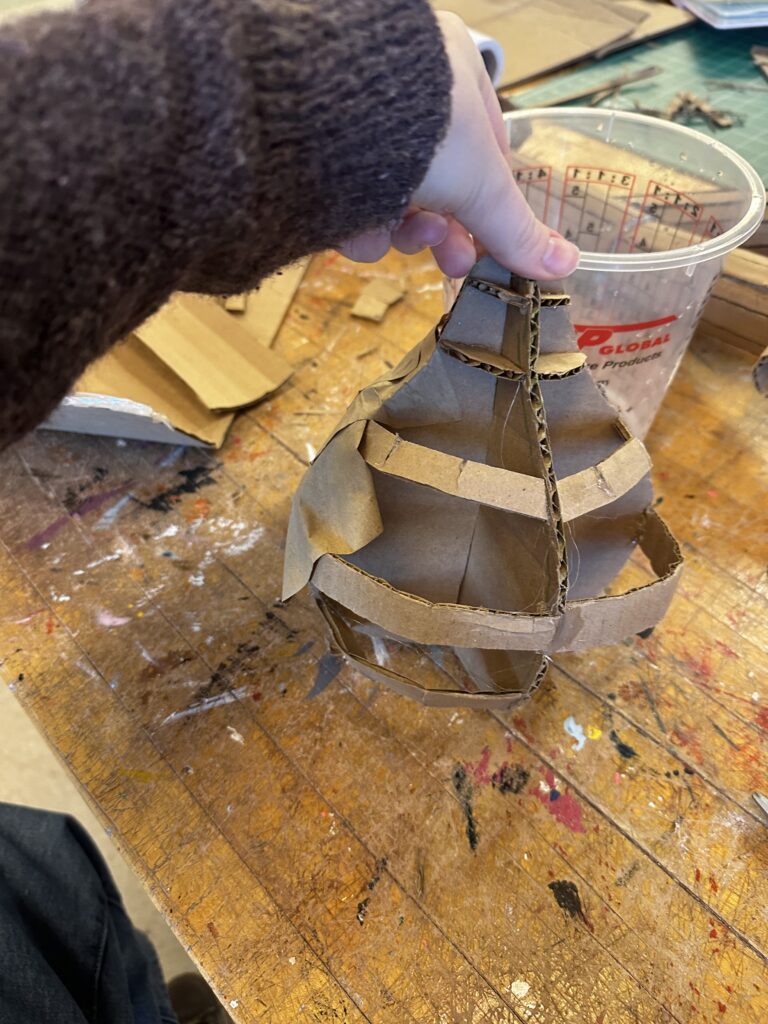
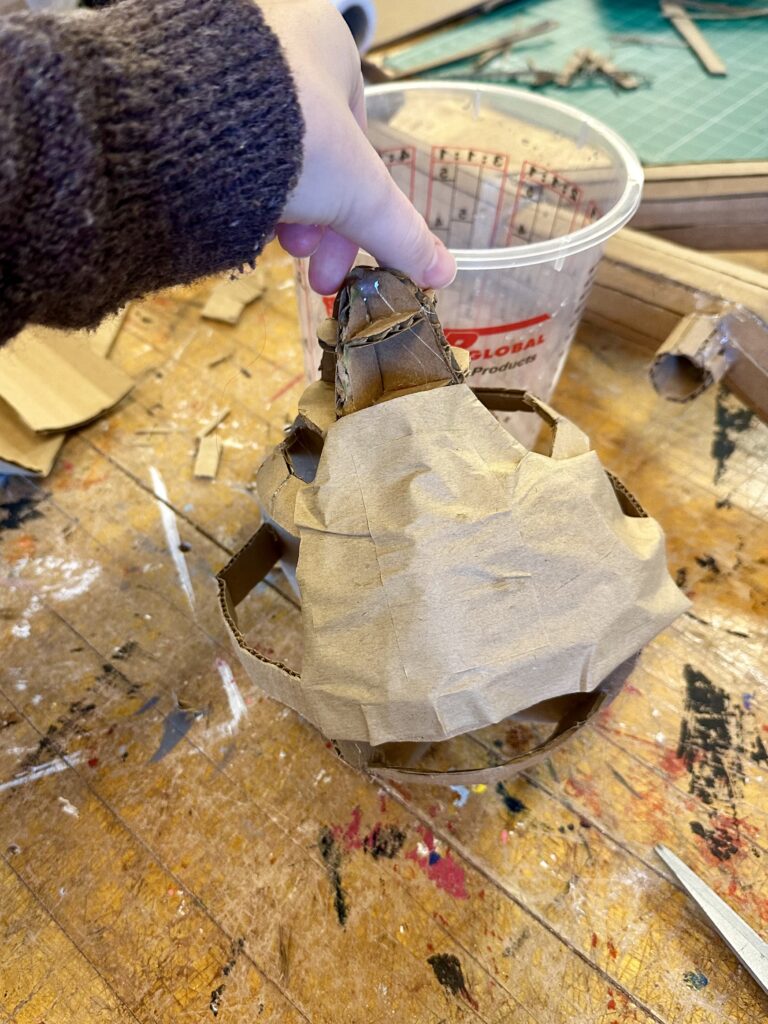
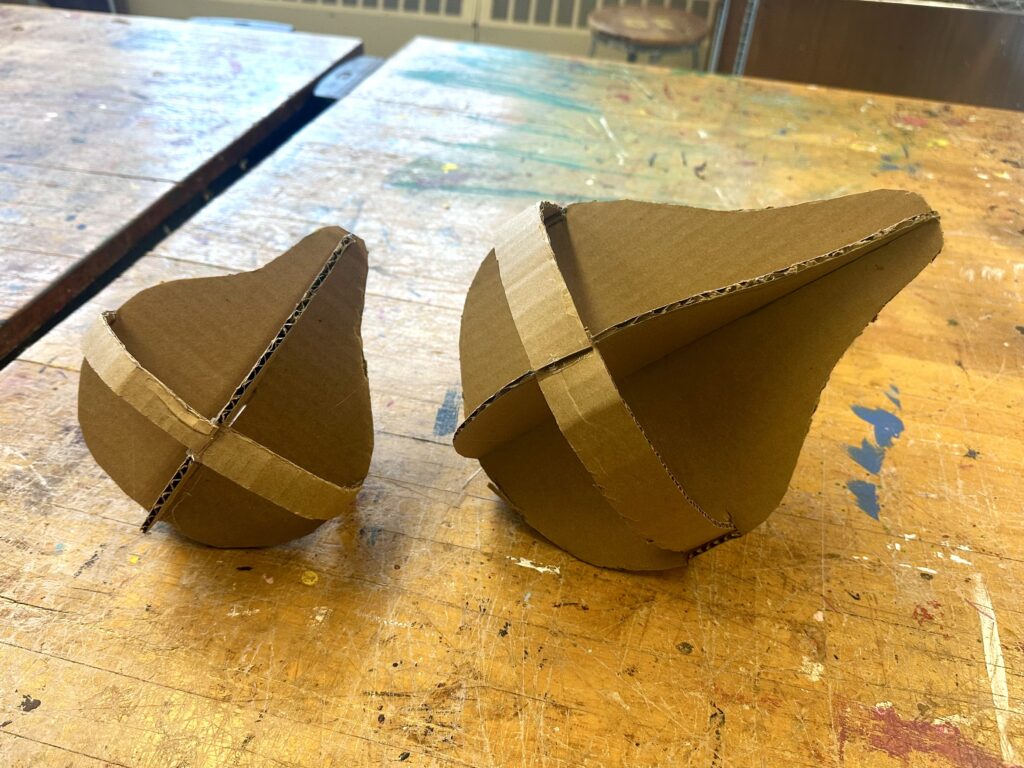
To make the figs, I cut out two 2D profile-view figs and joined them together by opposing center slits. From there, I added bands of cardboard with dart cutouts to give the negative space spherical volume. Then I used cardboard tape in a paper mache fashion to create the surface that I then painted. I repeated this process to make the other fig and glued them on to the branch.
I wasn’t sure what angle I would need to make the top of the branch so it would be flush with the ceiling. To work around that, I left a lot of excess branch at the top so I could later bring it to the sight and cut it off accordingly. Then I added on disks so I could use tacks, nails, tape, or whatever else I would may need to hang it up. I painted the disks white to blend in with the wall and ceiling to make it as naturalistic as possible.
Final Product
After a brutal process of hanging up the piece with its artist statement, I could finally see the main components as to why this piece is so dynamic. The figs actually live in the environment. The branch grows out of the pillar and connects to the ceiling at two different points. I believe the piece has two different focal points at each fig, making the eye travel along the branch better. The use of an ombre effect and dry brushing technique also made the sculpture look more naturalistic and dynamic. By painting the piece naturalistic colors instead of painting them two solid colors like I originally planned, it supported the viewers to better perceive that they’re figs and not pears, and to feel more emerged in the art .

Artist Statement
Allison Surprenant
The Ripe Fig
Since I’m a TRIO student, I wanted to make a sculpture for the Pass Office, so I wanted to create something relating to a challenge I’ve faced that the people in the PASS Office have helped me with. I recently learned about the fig tree analogy which in summary, each fig represents different options for your future. One fig could be a life as a doctor, another as a florist. There are so many options to choose from that the person becomes paralyzed with indecision and all the figs rot away before they’ve picked one. I’m a very indecisive person myself and since being at college feel that I’ve changed my mind about my career path once per semester. I would come to my TRIO advisor looking for some direction and they would always assure me that I don’t need to have every step of my future planned out fully, that I will still gain skills that’ll be applicable to many different careers. I’ve learned to take one step at a time and not to worry so much about the unknown of the future. What I wanted to convey with my sculpture is that you don’t always need to look at the whole fig tree and try to decide the best best one, that’s it ok to just look at the branch in front of you and pick the ripe fig. Then if you’re not full, you can still eat other figs when they’re ripe.
To craft the organic shaped branch, I needed to slit the cardboard vertically so it bends into a cylinder and cut darts into it so it changes direction. To make the figs themselves, I took two identical fig-shaped pieces of cardboard and joined them together by opposing center slits. From there, I added bands of cardboard with dart cutouts to give the negative space spherical volume. Then I used cardboard tape in a paper mache fashion to create the surface that I then painted.
Leave a Reply