| Formal | Elements of design: color, texture, material, scale, |
| Technical | Correct use of underglaze and clear glaze Use mixed methods of hand building to create a hollow form Additive and subtractive methods |
| Conceptual | Create a contemporary object using forms and iconography from the tradition of historic vessels |
For this project you are to choose 3 different vessel forms dated pre 1500. Choose these vessels in regards to shape, composition, and surface design. Have representations (tracings, photocopies, printouts, etc…) of these vessels that you can reference and know:
- the period of history in which they were created/ date
- what country they are from
- a cultural reference of tribe or geographic area
If you cannot find this information then you can’t use the vessel. You will be explaining your results at the final critique and in written form.
Sketches
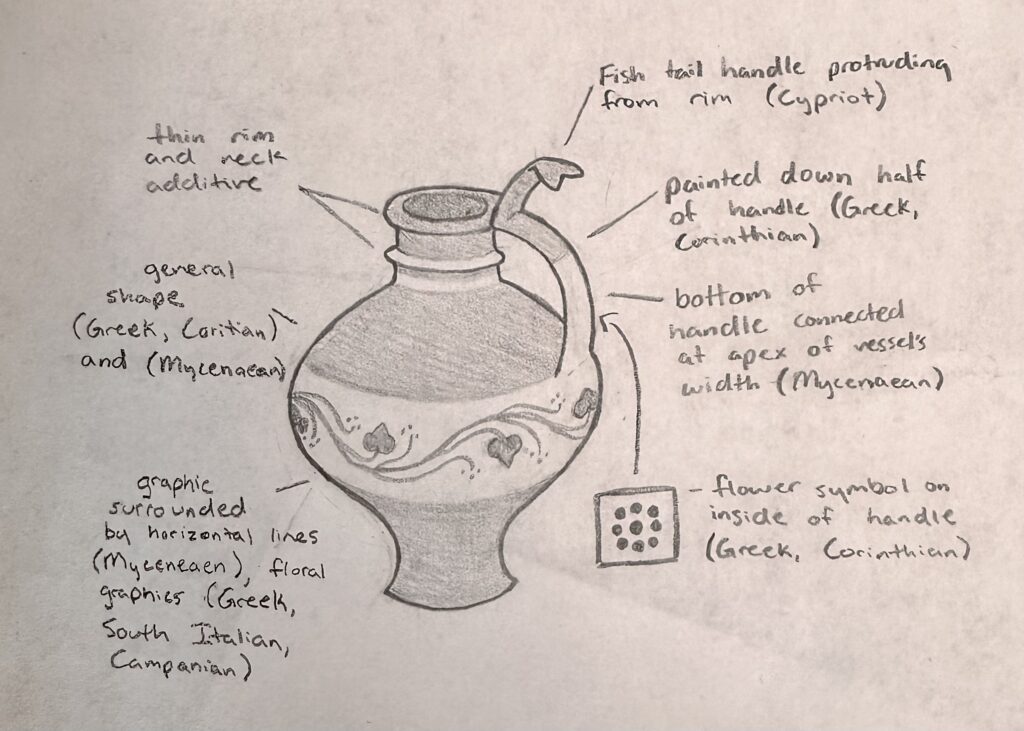
In a sketch take the three images you have chosen and combine them together into one vessel. Example: use the form of a Korean vessel, the handles from a Minoan vessel, and the surface design from a Mayan vessel. Mix cultures to create the final.
Final Vessel Guidelines
- 12 inches in height.
- Use of colored underglazes
- Additive and subtractive methods of surface design.
- Should be an “enclosed” form that involves an S curve. The volume should be curvilinear and not a vertical tube.
- Incorporate handles on the form
Process
Vessel A – Terracotta jug, ca. 1600-1050 BCE, Mycenaean culture, H. 4 in.
Vessel B – Terracotta tankard – ca. 1600-1200 BCE, Cypriot culture, H. 4 9/16 in.
Vessel C – Terracotta neck-amphora, ca. 620-590 BCE, Greek, Corinthian culture, H. 11 1/2 in.
Additional Ceramic Piece – Terracotta kylix, ca. 400-350 BCE, Greek, South Italian, Campanian culture
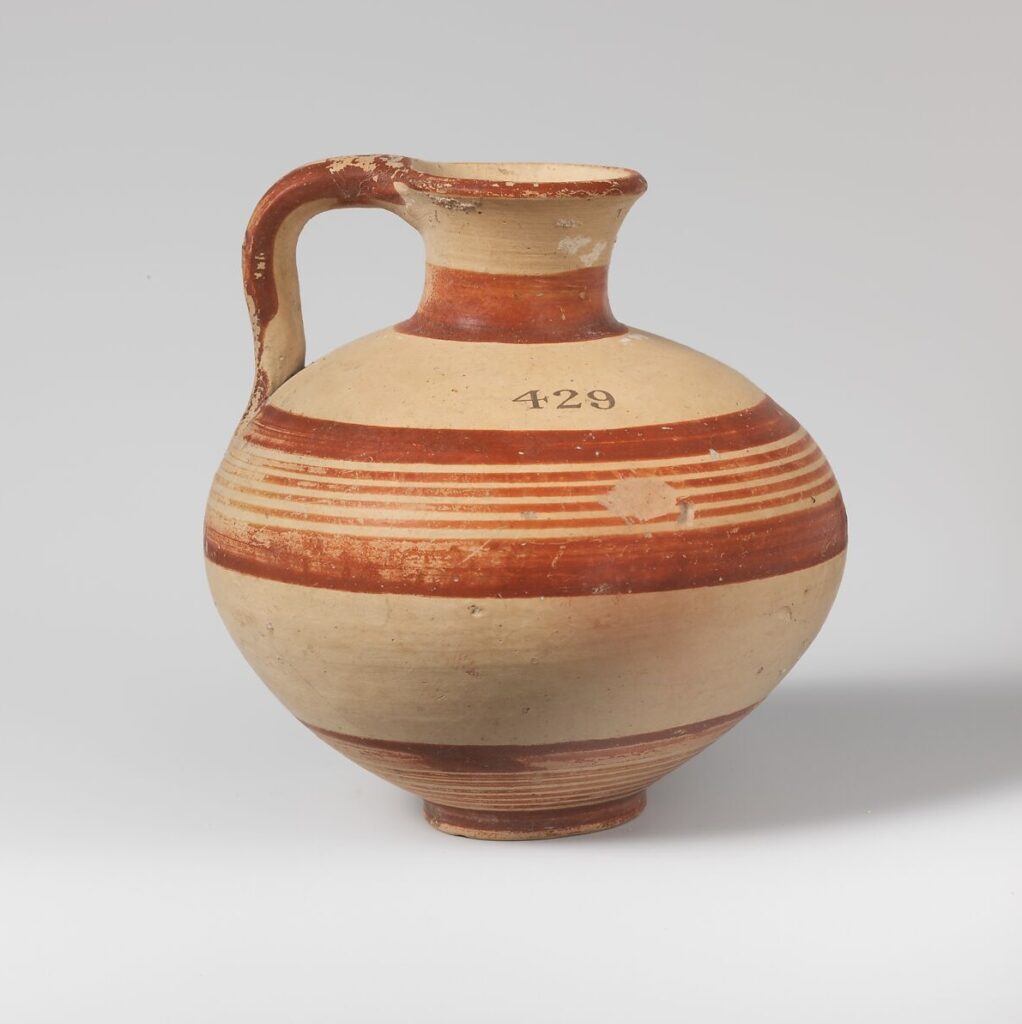
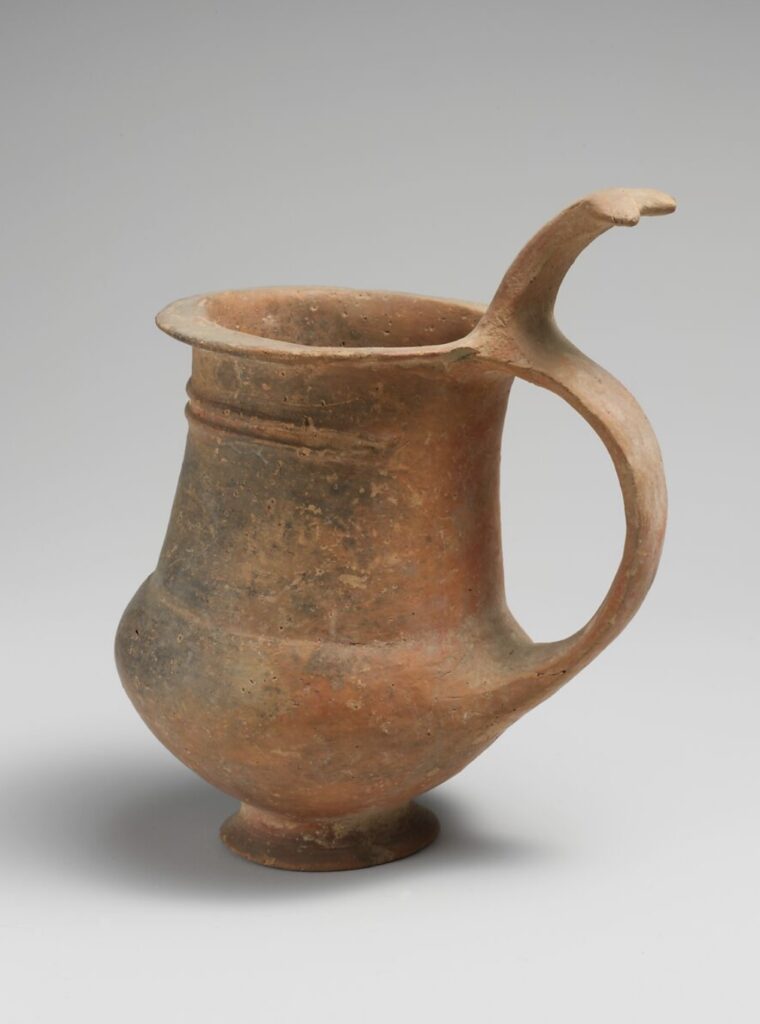
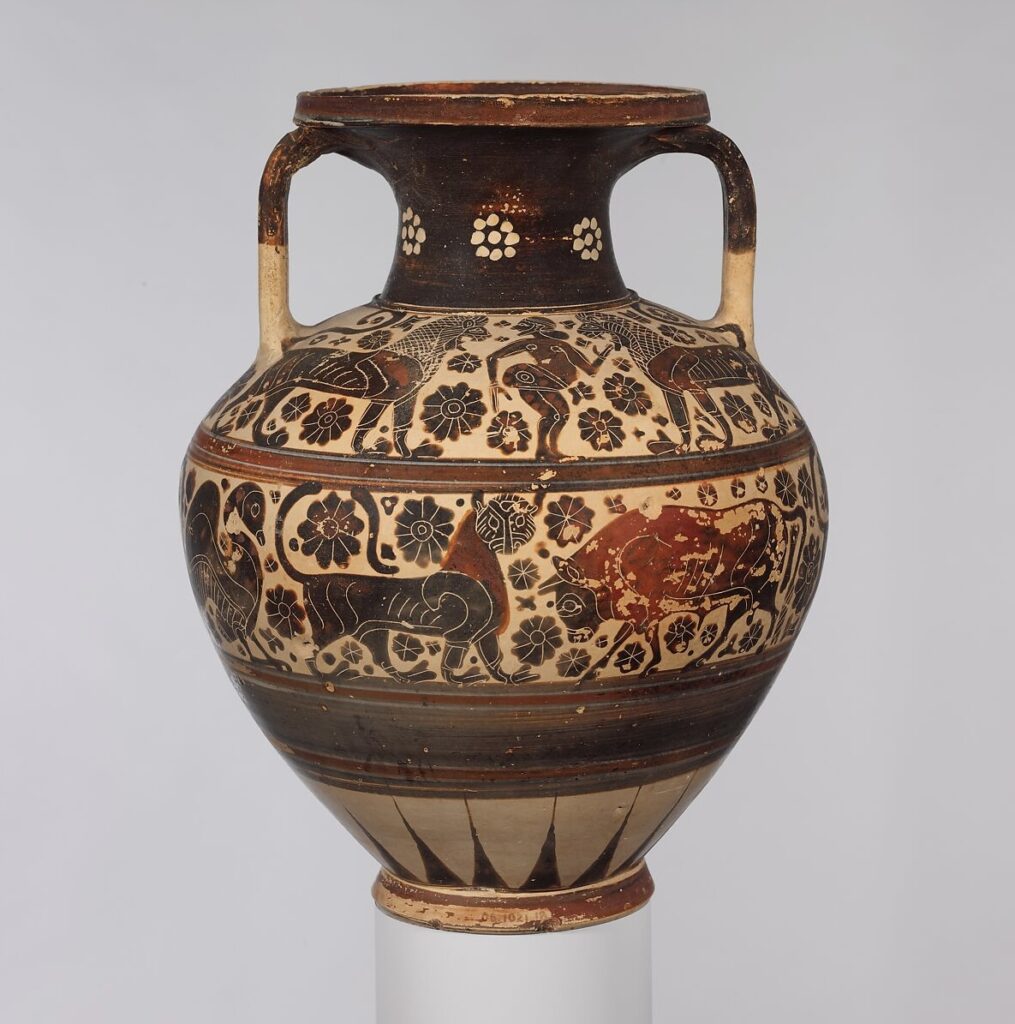
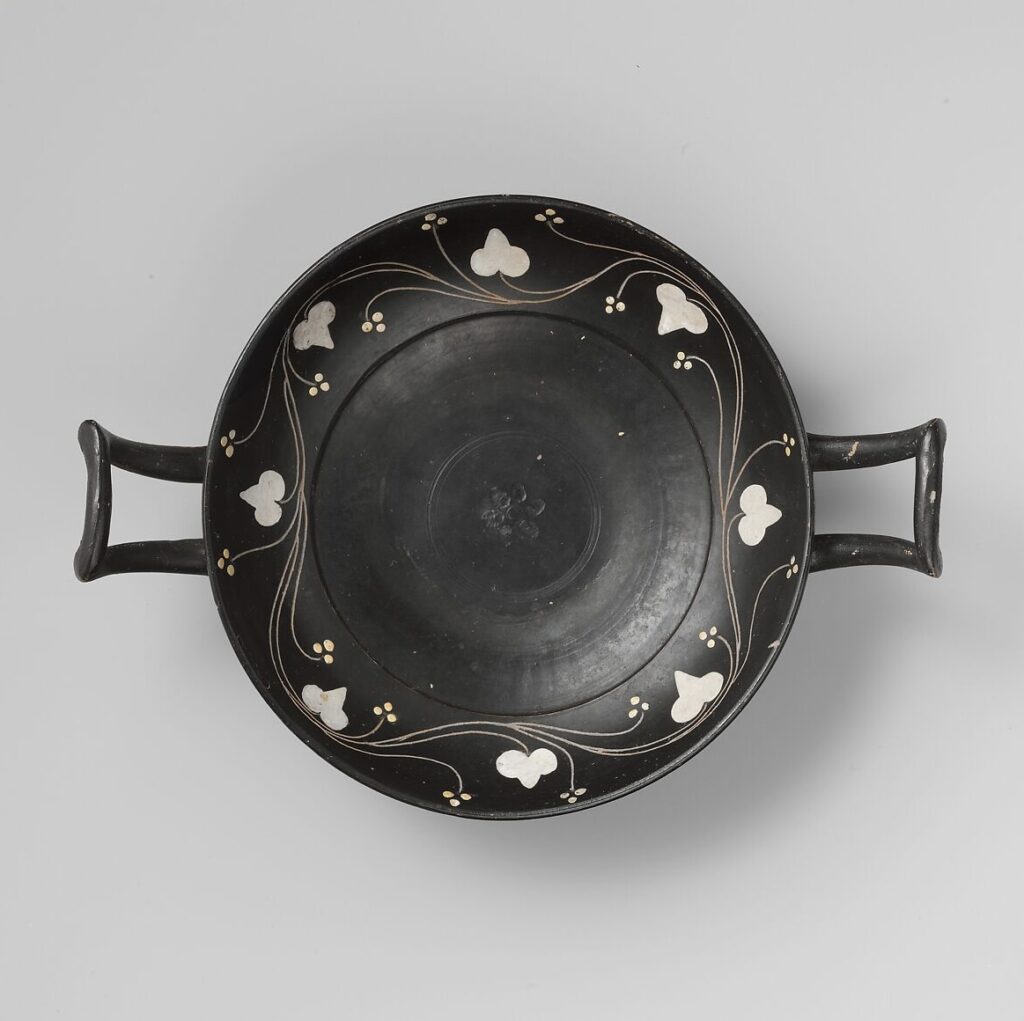
Vessel A & C is where I got most my inspiration of the general design of my Frankenstein vessel. I took another element of Vessel A from the handle. I wanted a handle to come from the rim of the vessel down into the greatest circumference measurement of the vessel like it does in Vessel A. I wanted another handle to come from the top of that handle and bow out like it does in Vessel B. The top handle also share the same shape at the tip of the handle as the reference. Vessel C was the only reference I felt unsure about recreating. I wanted to incorporate a graphic design that wrapped around the entire vessel and was enclosed by horizontal lines, but didn’t wasn’t to create an elaborate illustration of people, animals, and florals. That’s why I added another reference to add to my vessel that’s illustration was much more simple and my style. To make sure I had enough elements of Vessel C in my adaptation, I included the handle being painted halfway and added one of the geometric floral symbols on the inside of the bottom handle.
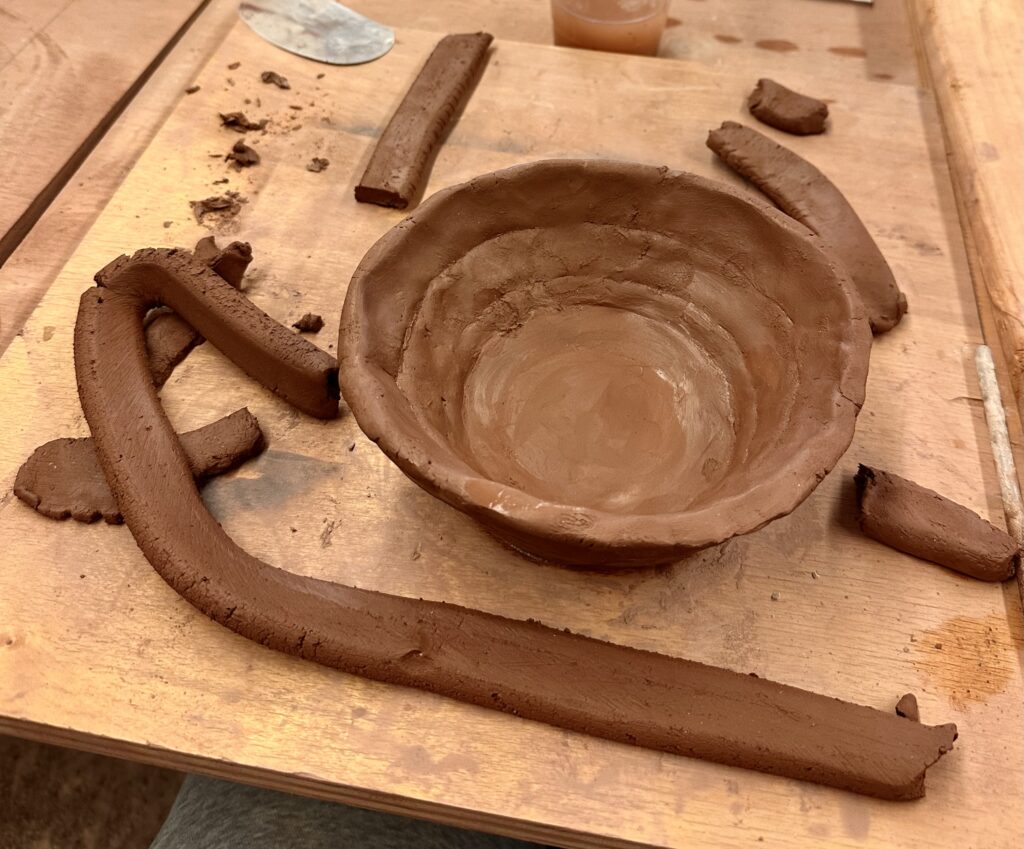
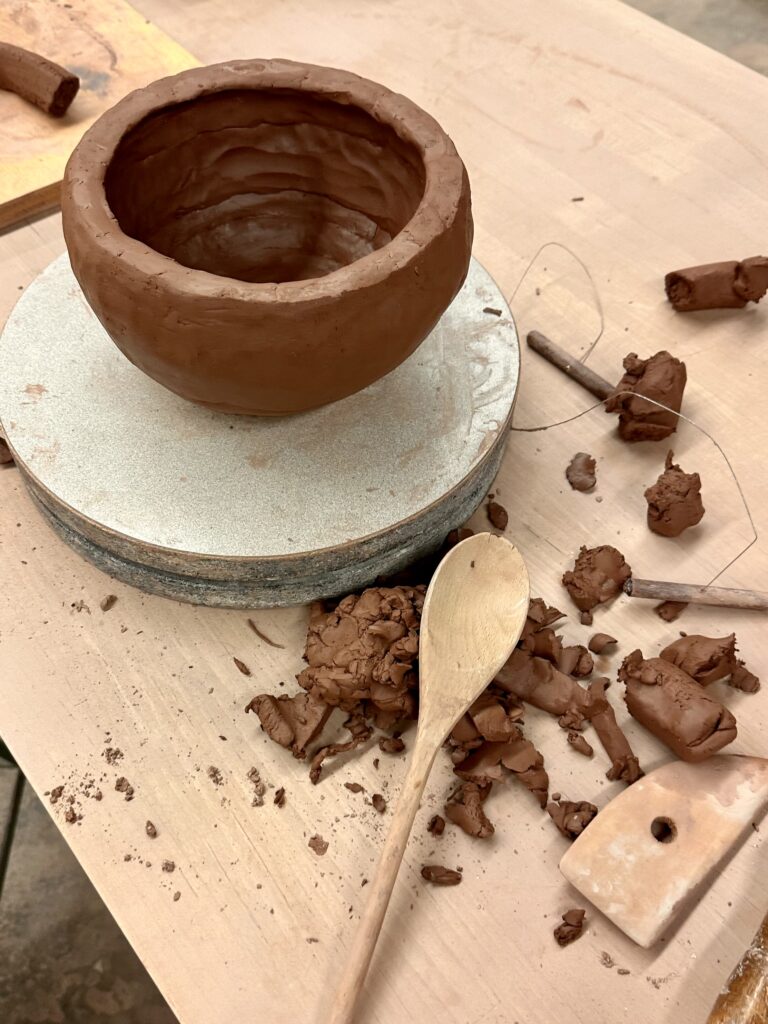
My first step was to make two large bowls to later attach later to create the circular part of the vessel. This was my second experience ever trying to create a vase-like sculpture out of clay. So this step was an experimental process of figuring out what working for me.
My first strategy was to make flattened coils that I would tediously attach in layers. However, this seem to become futile as I would thin out the walls too much in the areas I had attached the coils. So during my second go around of making the bowl I used much larger coils I didn’t bother flattening. After I would attach the coils to each other I would flatten them out myself in a pinch pit fashion. This proved to be a dramatically quicker process that gave me similar enough results.
Although, I tried to get a round shape that was closer to my sketch, it ended up being my circular than I anticipated. I tried to recover the original shape as much as possible by patting the walls in with a wooden spoon.
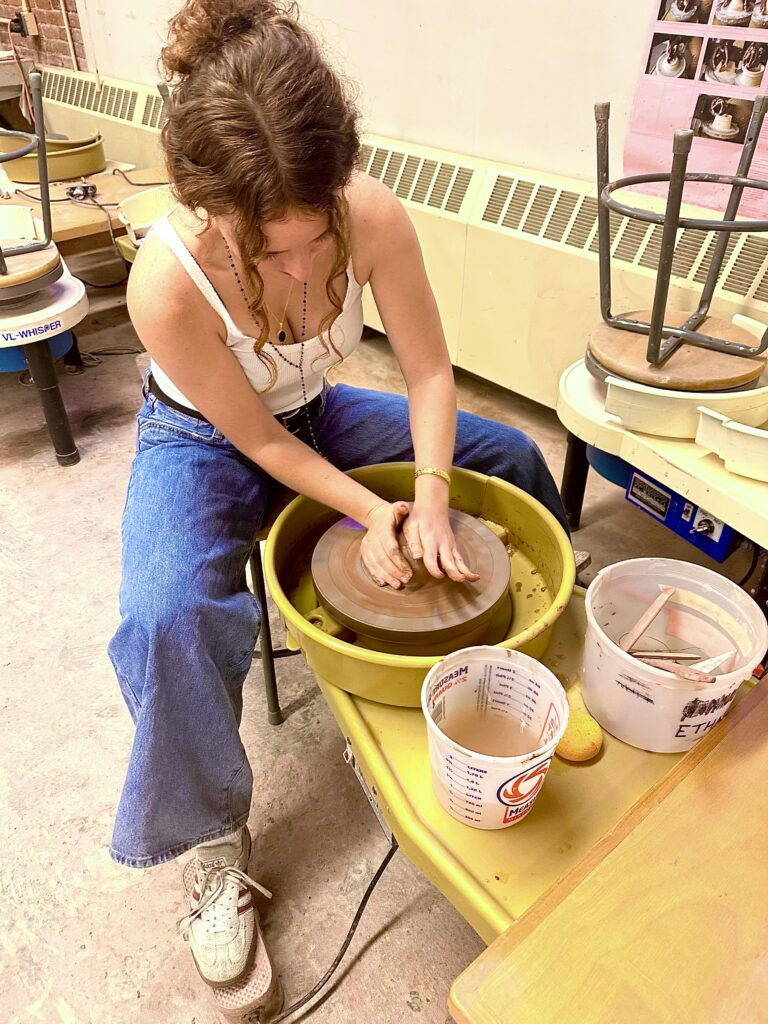
I had never used the wheel before so I decided to only do the smaller parts of the vessel, like the base and neck, on the wheel.
Using the wheel for the first time was an interesting experience. I surprised at how difficult it was to control the clay. Luckily, I found it to not be too frustrating because when I failed, it just felt like I was making mud pie. It reminded me of using a sewing machine where you use a pedal to control the speed, at the higher speeds you could more easily loose control and risk the precision of your work, which in this case would result in a mud pie.
I started with the neck of the vessel which I hard a hard time forming because I can’t breaking the neck when I tried to extend the length of the rim. I settled for a less dramatic rim and then attached the neck to the hollow sphere I’d already made. I took a break from the wheel to craft the handles of the vessel. I used a flat strip of clay to make the handles, one
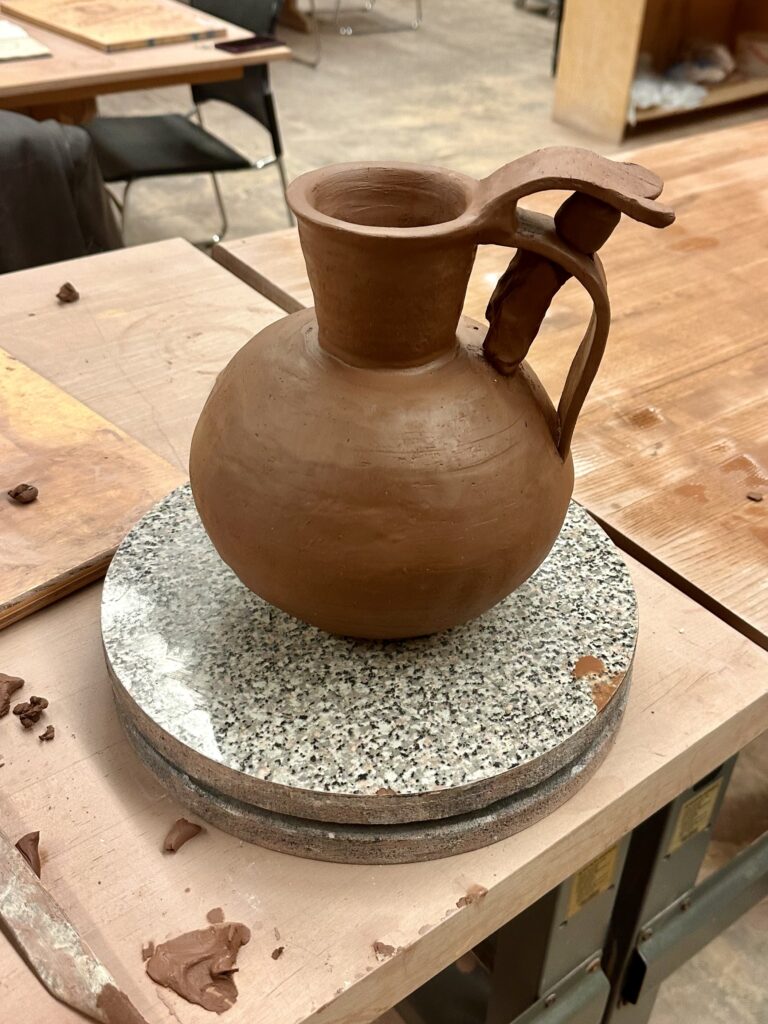
for the big bottom strip, and one for the smaller top piece. The most difficult part of making the handle was trying to get the clay to stand up right. The clay had to be wet enough to attach and bend, but dry enough to stand up right. I had difficulty with the latter and relied on other clay to keep the form up right. As you can see in the picture above, the clay acted as a pillar to keep the handles from drooping. It might seem that there is one handle with a decorative flourish on top, but I would argue that there are two since you could carry the vessel from either part.
Now that the handle was attached I would be able to accurately measure the height of what I had for the vessel so far, so I could calculate how tall to make the base. Although a tall base wasn’t in any historical vessel references, it was my way of adding height to the vessel to meet the assignment requirements. Once I attached the base I realized it was too short by a 1/2 inch, so I made another base to attach to the bottom which made the whole base over 13 inches. I created essentially a kiln bomb so I carved out the bottom of it. Something I didn’t foresee was that because I took away the support the solid base was providing, it began to collapse. I tried to rectify this but no matter what I did, it just kept sinking into itself. I decided to take pressure off the bottom by laying it down, the only problem with that is the handles or the walls of the vessel would warp from the pressure on them. To prevent contorting it, I crumpled up newspaper to try to support the sides and handles. This worked surprising very well. If course I couldn’t prevent all the caving but I tried to fix the damages when it was less wet.
After it was bone dry I was able to begin painting with black underglaze similar to Vessel C and the additional ceramic piece, leaving the rest of the vessel a natural warm terracotta color similar to the warm tones in the rest of the references. To line up the horizontal lines smoothly, I put the vessel on the wheel and held the paintbrush to it, so all I had to do was push a pedal. After creating my lines I blocked in the glaze and drew on my design.
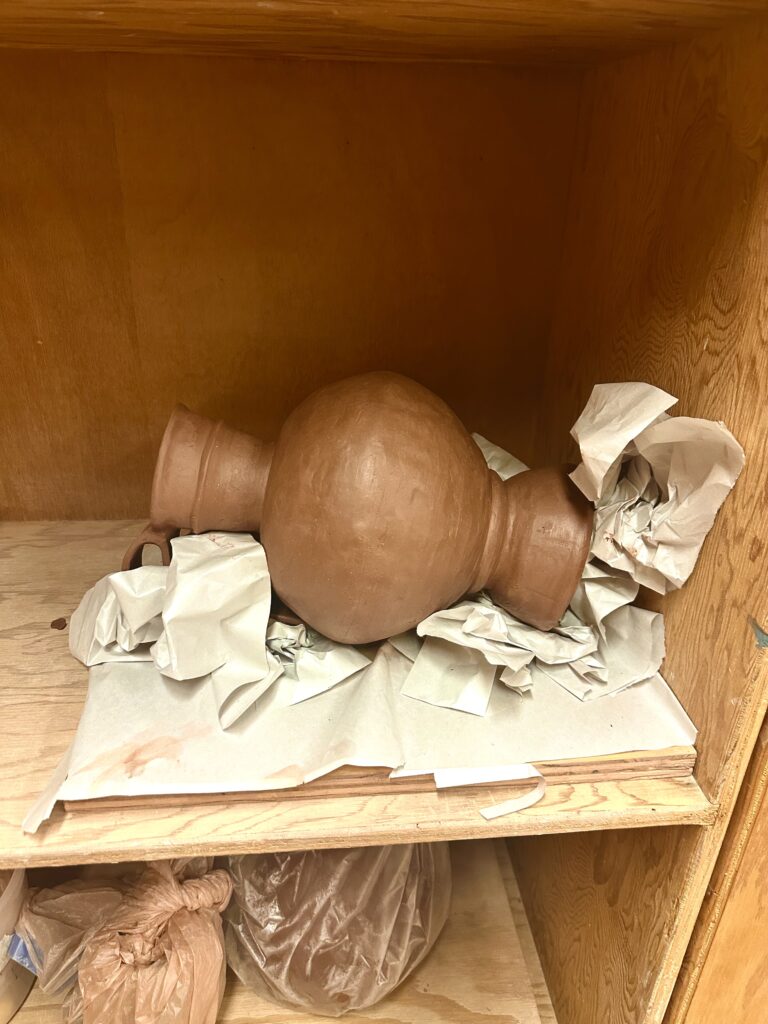
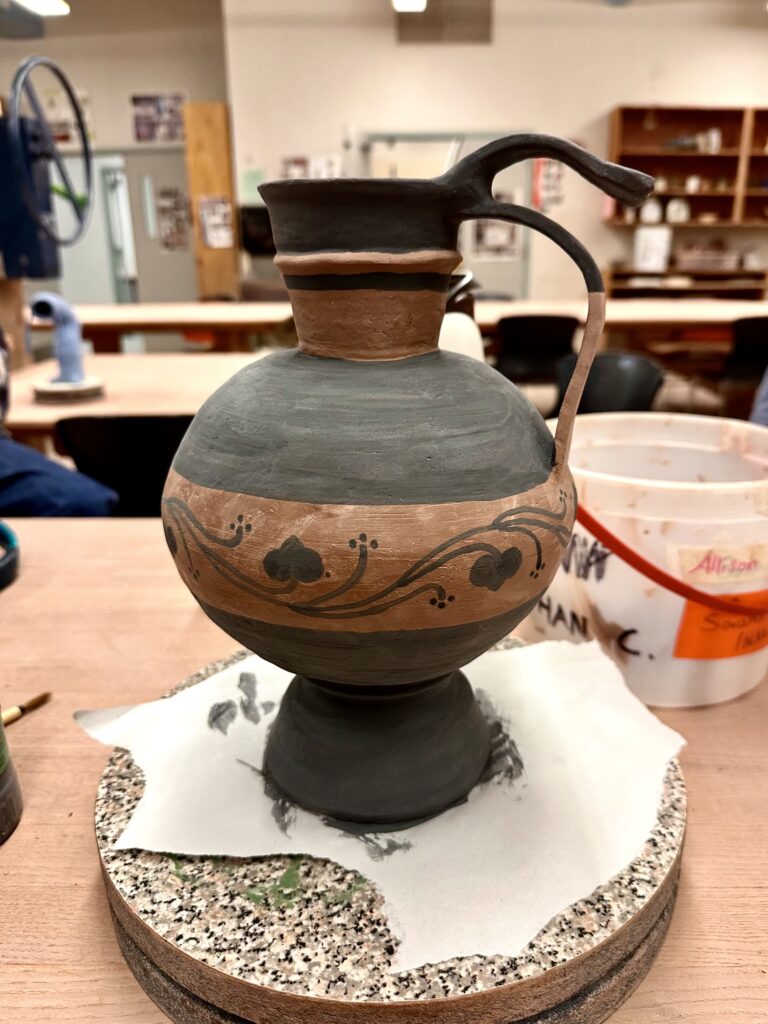
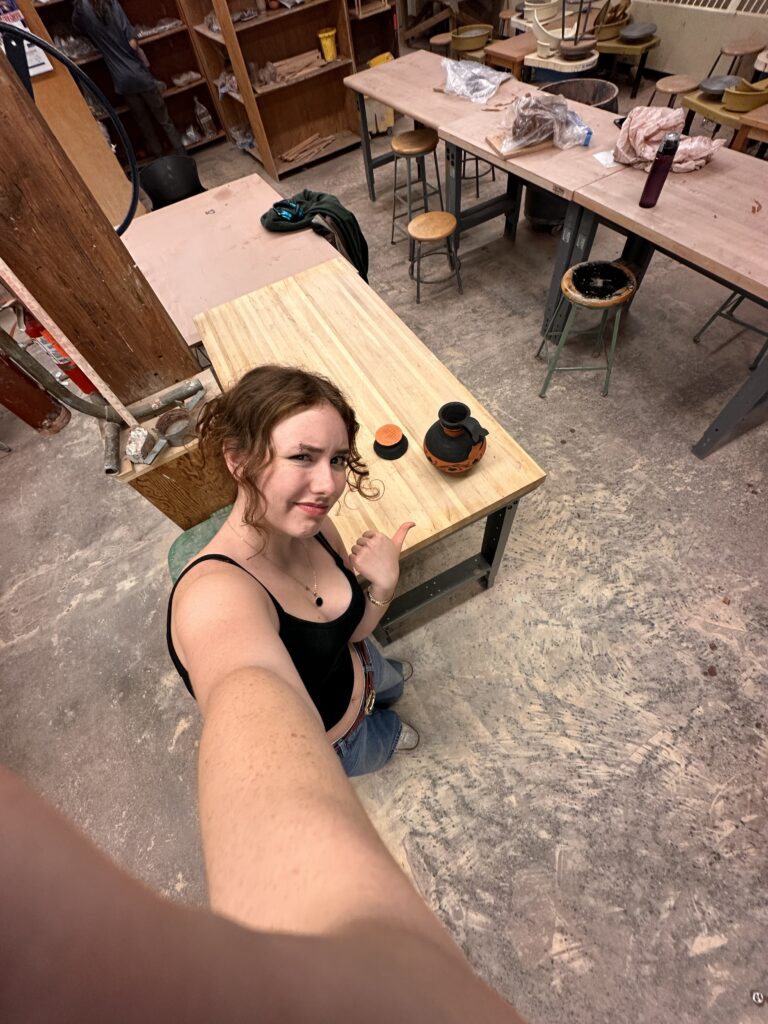
Then my vase got bisque fired! I checked to see if y handle was secured to the vessel as that was what I was most worried about since they were so thin. Luckily, they were fine. As I was taking pictures of the vessel it popped off the base! At least you can see my score marks on the vessel for proof I did my best.
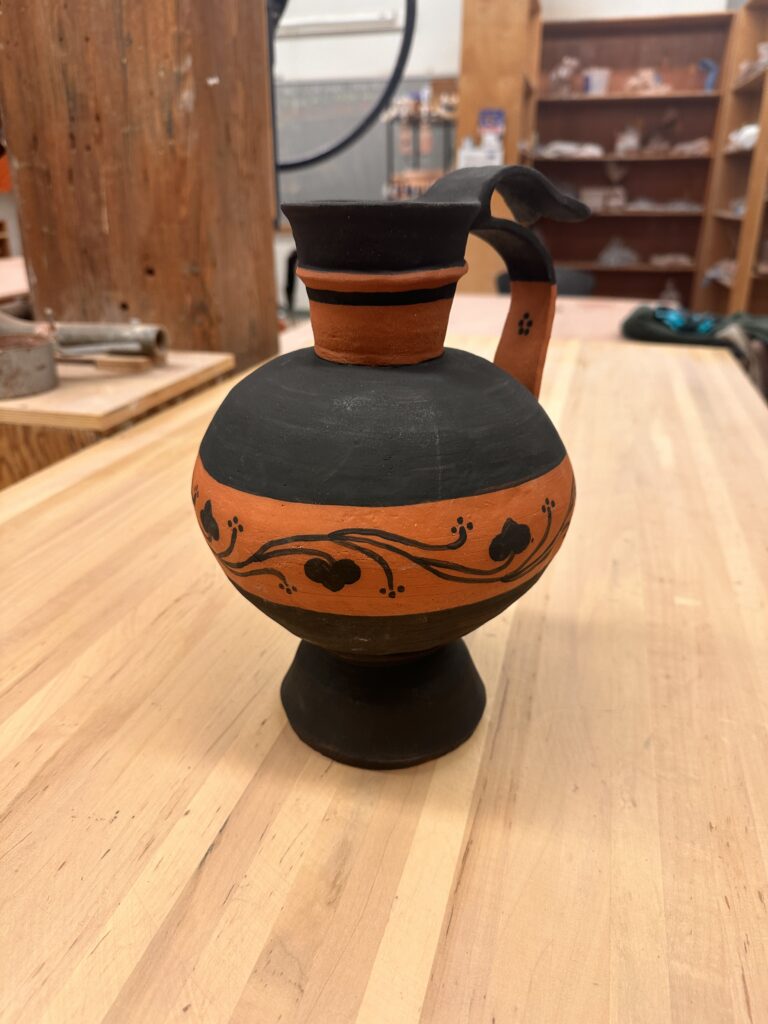
At this stage all I have to is reattached the base. I was originally thinking to put a clear coat of glaze on top of the entire vessel but now I’m reconsidering this after seeing how clumping it can look. If I had the tools available, I would use an airbrush to apply the glaze to get a thin even coat to avoid getting a goopy texture on it.
Final glazing aside, I think the this form works really well. The contrast of the circular middle part of the vessel next to the planar slabs creates an interesting visual especially with how it’s painted. The geometric black stripes also contrast well with the organic pattern that enevlops the vessel. The whole piece has pleasing contrasts as I choose black against the bright orange of the bare low fire clay. I also think the handle that hovers above the lower longer one adds an interesting flair that brings the piece personality.
Leave a Reply